
How to make Taho and Tokwa

TOKWA
Materials
500 gms soybeans
60 gms CaS04 Food grade (calcium sulfate)
Utensils
grinder or blender
stove
stainless casserole
weighing scale
basting spoon
plastic basin
knife
cheesecloth (1 yard)
tokwa press
Procedure
1. Weight 500 grams soybeans
2. Soak in clean water for 6 hours.
3. Wash and clean, remove the hulls.
4. Grind the soybeans adding water at a time till the volume is 2.5 liters.
5. Strain in cheesecloth (katsa).
6. Boil the soymilk for 10 minutes
7. Cool to 55oC to 60oC.
8. Add 60 grams of food grade CaS04.
9. Transfer to a cloth-lined tokwa mold.
10. Press for 1 hour.
11. Remove from press and slice to desired size.
12. Pack in plastic bags, seal and store in refrigerator.
TAHO
Materials
½ kg soybeans
4 liters water
1½ - 2 pcs gulaman
¼ tsp vanilla
Syrup
1 kg brown sugar
1 ½ liter water
Utensils
2 pcs colander
1 pc osterizer
2 pcs casserole
1 unit stove
2 pcs basin
2 yards cheesecloth
Procedure
1. Soak beans overnight.
2. Grind finely while adding boiling water.
3. Put soybean in a cheesecloth and squeeze out milk.
4. Boil soymilk for 5 to 10 minutes.
5. Stir and add gulaman.
6. Allow to boil for 10 minutes.
7. Pass the mixture through a cheesecloth then put in a molder.
8. Cool and serve with syrup and sago.
Source: Great Flavor of Soybean Phil. Council for Agriculture, Forestry and Natural
Resources Research & Development, DOST, photo from manilasunset.com and pinoydelikasi.com
How to Start a Pawnshop Business

Pawnbroking activities in the Philippines are governed
by Presidential Decree No. 114, otherwise knowm as the Pawnshop
Regulation Act. Only Filipinos may own a pawnshop organized as a single
proprietorship. For partnerships and corporations, foreign ownership
should be limited to 30 percent.
So what's the procedure involved in starting a Pawnshop Business?
1. CALL Bangko Sentral ng Pilipinas (BSP) pawnshop hotline, (02)524-8713, to check if the pawnshop name you want is already taken.
2. Register your business either at the Department of Trade and Industry (DTI), for single proprietorship, or the Securities and Exchange Commission, for partnerships or corporations.
The DTI is at the Trade & Industry Building, Sen. Gil Puyat Ave., Makati. In the provinces, DTI offices are in or near municipal buildings. Application forms are also available at DTI's website, http://www.dti.gov.ph. Only Filipinos may own a pawnshop organized as a single proprietorship. For partnerships and corporations, foreign ownership should be limited to 30 percent.
3. Secure a business permit from the city or municipality where pawnshop will be located.
4. Register with the BSP. See http://www.bsp.gov.ph/regulations/forms.htm for the complete list of requirements. These include permits from the DTI or SEC and the local government, an information sheet, personal data sheets, bank certification of at least P100,000 capital and location sketch.
5. Pay the processing fee of P1,000.
6. It will take two to three weeks for the BSP to process your application. Make sure you open your business within six months after the application is approved or your permit will be revoked.
Source: Jamie Alarcon, Chona Galang, PDI Research, photo from www.openeyegallery.co.uk/
How to Start a Restaurant and Catering Business

Starting
a business can be a rewarding undertaking, but it comes with its
challenges. Before starting a business in, it is wise to do your
research. Ask yourself if you are truly suited for entrepreneurship and
understand that significant effort may be required. You should
thoroughly enjoy the field you are getting into and you must believe in
your service; it may consume much of your time, especially in the
start-up phase. There are several issues to consider such as
regulations, financing, taxation, managing your business, advertising
and much more.
Maintaining High Health Standards
As a restaurant operator or food caterer, your main preoccupation should be to maintain high health standards. Maintaining traffic in your restaurant depends on it, as your restaurant will probably be inspected and appraised. Important steps to take into consideration when dealing with health issues include:
• food temperature control;
• protection of food from contamination;
• employee hygiene and hand washing;
• maintenance and sanitation of surfaces and equipment that come into contact with food;
• maintenance and sanitation of surfaces and equipment that do not come into contact with food; • maintenance and sanitation of washrooms;
• storage and removal of waste; and
• pest control.
Food Safety
To be successful in the catering business, one must produce delicious food that is safe and wholesome. The production of safe foods is your responsibility. Time and temperature abuse of foods contaminated with foodborne pathogens, such as Salmonella, Campylobacter and Escherichia coli O157:H7, will certainly lead to a foodborne outbreak that would likely destroy your reputation and business. Foodborne illness can be avoided if you and your employees follow safe food handling practices.
• Purchase high-quality foods from a reliable vendor. The food should be in good condition with the packaging intact, fresh (not beyond expiration date), and at the proper temperature.
• Store potentially hazardous foods, such as meat, poultry, eggs, milk and fish, immediately in the refrigerator (33 to 40°F) or in the freezer (-10 to 0°F). Dry staples should be stored at 50 to 70°F. Practice First-in-First-Out (FIFO) to insure safety and quality of your menu items.
• Ideally, frozen foods should be thawed in the refrigerator 18 to 24 hours prior to preparation. However, thawing under cold running water (<70°f).
REMEMBER: Keep hot foods "HOT" and cold foods "COLD."
Reheat all potentially hazardous foods including leftovers to 165°F. Gravy should be heated to a boil (212°F). Discard leftovers stored in the refrigerator beyond 3 days (Gravy 2 days). Leftovers stored in the freezer should be consumed within 4 months.
• Practice good personal hygiene when preparing and handling food. Wash hands before food preparation, after handling raw foods, after using the restroom or at any time the hands become soiled. Gloves may be worn when handling and preparing food. However, gloves can become soiled as easily as hands and should be changed often.
• Take measures to prevent cross-contamination of food.
o Clean and sanitize food contact surfaces such as counter tops, cutting boards, equipment and utensils. One tablespoon of bleach per gallon of water is an effective sanitizing agent.
o Wash fresh fruit and vegetables thoroughly under cold running water. In refrigerator storage, make sure fresh fruits and vegetables are wrapped or stored in containers separately from raw meats.
o Wear clean clothes and aprons when preparing food.
o Do not use the same towel to wipe food contact surfaces that you use for wiping hands.
o Clean storage and kitchen areas regularly.
o Practice good housekeeping.
o Implement a pest control program for eliminating the spread of disease.
Provide safe food for your clients by following and practicing food safety guidelines. Make sure that you and your employees are current with state and local regulatory requirements for food service establishments. This way you can rest assured that the food you provide to your clients is safe and wholesome.
Designing your Restaurant and Calculating Seating Capacity
Depending on your experience, finances, location and customers, you will have to decide on the type of restaurant you want to operate (traditional, ethnic, specialty, coffee shop, fast food, cafeteria, self-serve, etc.), and aim for a practical, useful layout, that will set the mood. It would be good to have all of the following:
• seating/waiting areas, serving room, cashier area, rest rooms, bar (optional);
• one or more areas from which you can view the entire restaurant;
• lighting, signs and obstacle-free traffic flow;
• a variety of seating arrangements: 50% of customers come in pairs; 30% come alone or in groups of three; and 20% in groups of four or more;
• adequate room - the suggested square footage requirements per chair are: 10-20 sq. ft. in traditional restaurants, 10-12 in cafeterias, 7-17 in coffee shops;
• a kitchen that allows efficient and effective food preparation and interaction between staff;
• safety in movement, dry and cold storage, dish washing, an area for staff's personal items;
• convenient delivery zone, ease of cleaning and maintenance, and proper ventilation and lighting.
To determine the maximum potential of your restaurant and break-even point:
1. determine desired profit - convert to percentage of sales to get sales required;
2. determine number of operating days - divide number of days into sales to get average daily sales;
3. estimate volume percentages for meal periods (breakfast, lunch, dinner);
4. multiply figures in step 3 by average sales per day to get dollar volume per period;
5. determine average check per meal period;
6. divide dollar volumes in step 4 by average check for the number of patrons per period;
7. estimate a) average seat occupation per meal period; and b) time per meal period;
8. divide time per period by average occupation to get seat turnover per period;
9. divide possible seat turnover into number of patrons to get number of seats required per period;
10. take the largest seating requirement in step 9 and add a 20% safety margin for the seating capacity.
Managing Your Operation
Insurance
Insurance needs for businesses vary greatly. It is best to choose an insurance agent or broker familiar with your size of business and, in particular, an agent familiar with your type of operation. If you don't have an insurance agent, it could be a wise decision to ask other business owners in your area to recommend one.
Your local restaurant association may also have information about insurance packages specifically tailored for restaurants. The following list is included to remind you not to overlook the complex areas of business insurance. It is best, however, to discuss your specific requirements with your insurance agent.
Basic insurance:
• fire insurance (extended coverage on buildings and contents);
• liability insurance;
• burglary protection (theft coverage); and
• dishonesty insurance (covers thefts by employees).
Marketing/Advertising
Word-of-mouth advertising and good public relations are often the best ways of promoting your business. Depending on your market and its size, also consider flyers, business cards, brochures, newspapers (especially for holiday promotions), radio, TV, the phone book and the Internet. Also, bear in mind that a satisfied customer is good advertising. Referrals are also a valuable way of making customers aware of your products or services.
A web site is also a good marketing tool. It should have details to describe the location (your address, telephone and fax numbers, and directions on how to get to your establishment), hours of operation, services offered, credentials and anything else you think may be of interest to potential customers. However, once you launch a web site, you should update it on a regular basis.
Participating in community events is another way of advertising your business. You may also want to hold events that will promote your business. No matter how you choose to market your business, it is wise to track how your clients became aware of your establishment - this may help determine your future advertising strategies.
Choosing Your Location
Choosing the right location for your business is important. Considerations include the needs of your business, where your customers and competitors are, and such things as taxes, zoning restrictions, noise and the environment. For most businesses, an appropriate location is critical.
Start-Up Costs
You may choose to start your catering business by renting items to keep initial costs to a minimum. This will allow you to: 1) Build a reputation; 2) develop some capital for investment and expansion and 3) evaluate how much time and money you want to invest and the impact that this business will have on your family.
Furnishing and Equipment
Before you open your restaurant, you will probably want to buy tables, chairs, lighting and decorative items. You might also need a kitchen, a bar and dinner wares. The menu, size of restaurant and kind of service will determine the type of equipment you will require. For assistance in this area, you might want to try to get the advice of a sales representative or consult trade publications and manufacturers' Web sites. An important factor to consider when choosing equipment is the after-sales service and repair and their affordability.
Leasing Equipment - Another alternative is to lease equipment to help keep start-up costs down.
Used Equipment - Consider buying used equipment as a cost-saving measure. Sources of used equipment could be a restaurant that is closing or dealers in second-hand equipment. The drawback to this approach is that, often, there are no guarantees with the purchase.
Planning your Menus
Plan your menu carefully. Try to know what items your customers prefer and how they like them prepared. Try to provide variety while maintaining stable cost averages. Menu prices are a combination of food costs and what is needed to meet expenses and realize a profit. Generally, the price of an item is approximately three times the food costs, depending on restaurant type, operating expenses and competitors' prices. To establish pricing:
• estimate your sales - counter-balance higher cost items tagged with lower mark-up, with higher mark-ups on lower cost items;
• maintain a desired overall food cost percentage, usually 33-40% of gross sales, and a normal margin of profit; and
• balance items ranging in popularity - monitor high demand items which can determine your success.
Developing a Creative Menu for Special Events
Factors affecting menu planning include the type of event, time of event, number of people to be served, available equipment, number of food preparers and servers and the amount of money to be spent.
The menu needs to include a variety of foods that are acceptable to the customer and the occasion. Be able to suggest menus that show a balance in color, texture, shape, sizes, flavor, cooking methods and cost. Plan to include nutritious foods from each of the food groups, including:
• Meat, poultry, fish, dried beans, eggs and nuts;
• Bread, cereal, rice and pasta;
• Vegetables;
• Fruits;
• Milk, yogurt and cheese.
Plan for eye appeal by using at least four colorful foods on each menu or food tray. Plan for contrast in texture and flavor. Contrast crisp foods with soft, creamy foods. Use strong and mild flavored foods together. Balance light and heavy foods. Use foods that complement each other.
As a caterer, you will need to decide whether you will make all foods "from scratch," or purchase some convenience foods. If you make all foods, consider your skills, equipment and time as you plan menus. Also, it is important to prepare a quality product of standard consistency. Develop a quality standard for each item. Use "high-tech" equipment designed to produce a consistent product. After considering skills and equipment, compare the cost of caterer-prepared items with purchase costs. Evaluate for cost savings and quality consistency. Do this for each item offered before determining a pricing structure.
Develop an information packet that includes sample menus and prices, other services you provide, and past events you have catered. Develop a portfolio of pictures that shows how food was presented at these events.
Every caterer needs to develop a contract to operate in a professional, business manner. Write the contract in simple language that both parties can understand and state the terms of the agreement. Have an attorney review the contract form. Include the following items in the contract, as applicable. These are:
• Names, addresses and telephone numbers of parties involved (buyer and seller);
• Date of the agreement and date of the event;
• Time of event;
• Location of event;
• Room set-up, decorations, tablecloths, etc., to be used;
• Type of menu;
• Estimated and guaranteed attendance;
• Service arrangements;
• Duration of activity;
• Entertainment;
• Pricing arrangements and potential price increases;
• Deposit required (25, 30, or 50 percent of cost when the contract is signed);
• Discount (if any) for full payment at the time contract is signed;
• Cancellation provisions specifying cases of cancellation because of illness, broken engagement or death. The contract needs to specify how much of the deposit will be retained due to cancellation.
• Applicable taxes;
• Include space for signatures at the bottom of the contract form.
Carefully consider contract terms, write them in simple language, and print them in a size that is easy-to-read. This is to insure that everyone understands the terms of the contract.
Setting the Right Price
Setting the right price can influence the quantities of various items that consumers will buy, which in turn affects the total revenue and the profit in the store. In the end, the right price for the product is the price that the consumer is willing to pay for it. Hence, correct pricing decisions are a key to successful retail management. Systematic and informed decisions regarding pricing strategies must be made while considering a wide range of issues.
A major step toward making a profit in retailing is selling merchandise for more than it has cost you. The difference between the cost of the merchandise and the retail price is called the mark-up. These are the dollars that are now available to pay the operating expenses of the business. When establishing the markup on a product, two points should be noted:
1. The cost of the merchandise used in calculating markup consists of the base invoice price for the merchandise plus any transportation charges minus any quantity and cash discounts given by the seller;
2. Retail price, rather than cost, is ordinarily used in calculating percentage markup. The reason for this is that when other operating figures such as wages, advertising, and profits, are expressed as a percentage, all are based on retail price rather than on the cost of the merchandise being sold.
The following points will highlight issues that should be considered:
A. Target Consumers and the Retailing Mix
In this section, your attention is directed to price as it relates to your potential customers.
Is the price of this item very important to your target consumers? You need to know your customers' desires for different products and whether price is an important issue in their purchasing decision?
Have you established a price range that people will pay for the product? What is the high and low price that the merchandise will have to fall within for someone to buy?
Have you considered what price strategies would be compatible with your store's total retailing mix that includes merchandise, location, promotion, and services?
Will trade-ins be accepted as part of the purchase price on items such as appliances and television sets?
B. Competitor Considerations
This set of questions looks outside your firm to the competitive factors that you cannot directly control.
Do you know what your direct competitors are doing price wise?
Do you regularly review competitors' ads to obtain information on their prices?
Do you do comparison shopping of competitors to obtain information on their pricing strategy?
Have you considered how your competition will react when you enter the market place, and how will you deal with their reactions?
A Price Level Strategy
Selecting a general level of prices, while considering the competition is a key strategic decision, perhaps the most important.
Should your overall strategy be to sell at the prevailing market prices (?) or do you want to work at an above-the-market or below-the-market strategy?
Should competitors' temporary price reductions ever be matched?
Could private-brand merchandise be obtained in order to avoid direct price competition?
Catering
A catering business follows many of the same regulations as a restaurant. You should decide whether you want to run your catering business from your home or from your restaurant.
Source: http://www.cbsc.org, http://www.ext.vt.edu, photo from http://www.mb.com.ph (K Cunanan Catering)
Native Bee Keeping
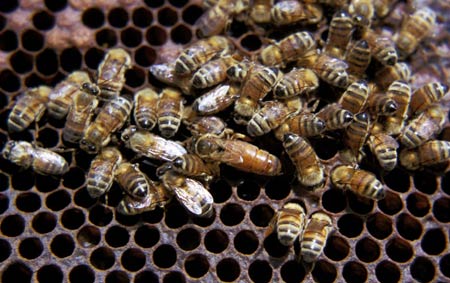
The native honey bee or the Asian honey bee (Apis
cerana) are good pollinators of crops. They also produce honey,
pollen and wax, all of which could be either directly used by farmers or
sold in the market.
Compared with the exotic European honey bee (Apis mellifers), our native honey bees are more resistant to pest and diseases Also, colonies of native honey bees are available everywhere and so it is easy to start with one or two colonies of this kind of honey bees. Being tropical, our native bees are smaller and could produce 2 to 6 kg of honey per year while the European honey bees could yield 50 kg of honey per year. Native honey bees also have greater tendency to abscond or leave suddenly, deserting their hive.
Since 1948, there have been attempts of bee keeping of European honey bees due to several reasons; i.e. gentleness, high honey yield, lesser tendency to abscond, etc. But two major problems have limited the culture of this species. These are: (1) lack of queen bees and (2) susceptibility to mites.
Because of biological and economic considerations, native honey bees are more suitable for bee keeping by small farmers. Less capital is needed in bee keeping these honeybees. If farmers have enough resources and skills, they may try bee keeping the European honey bees.
Suitable areas for rearing native honey bees
Colonies of native bees could easily be established in areas where there are plenty of flowering plants throughout the year. Bees in these areas will practically yield more honey.
Having diversified farms, Cavite and Batangas provide good foraging grounds for bee colonies. In Quezon where coconut palms flower throughout the year, bee colonies under coconut plantations would just be alright. Mindanao is another good area to raise honey bees.
One practical method of assessing the suitability of an area for bee keeping is counting the number of wild bee colonies. If the density of bee colonies is high, it means that the area is suitable for bee culture.
Materials needed in transferring wild colonies of honey bees
1. Wooden hive
2. Frames with wires
3. Nylon plastic
4. Knife
5. Bee veil
6. Bee brush
7. Smoker
8. Ax
9. Bolo
10. Plastic sprayer
11. Queen cage
12. Bee escape
How to transfer honey bees:
Transferring wild colonies of bees to a wooden hive. Be sure that all materials are available.
Bolo or ax may be needed in exposing the colony of native honey bees. Determine the number of combs in the hive. Spray worker bees with small amount of water to prevent bees from flying. A little amount of smoke is needed to drive worker bees away from the first comb. By means of a sharp stainless knife, cut the base of the first comb. Oftentimes, this comb does not contain brood (immature bees) or honey. Using water and smoke, do the same to the other combs.
Fix the comb with capped brood (pupal stage) on the center of the wired frame. To do this, cut evenly the base of the comb. Place the comb below the wired frame and cut through the middle section of the comb by using the wire as guide. Now, could push half of the comb through the wires. Tie the comb to the top bar by means of a plastic straw. Bees will begin to cluster outside the combs because of the disturbance. Occasionally, examine this cluster to see if the queen is with them. One or two combs with capped brood is enough for the new hive depending on the total population of the feral or wild colony. Be sure that the comb attached to the frame would be totally covered by bees after the operation.
Now, look for the queen bee. Among the bees in the colony, she has the longest abdomen. If you find her, grasp her wings gently with you two fingers. Do not hold her on the abdomen. Put the queen bee on the cage together with five newly emerged worker bees. After covering the cage, tie it below the top bar adjacent to the comb. With the queen bee and two combs on the box, you are now ready to transfer all bees to the box. Give the queen bee a handful of bees. Some of these bees will guide the remaining bees to the new hive. Apply some smoke to the cluster of bees remaining in the old hive to facilitate the process of bee transfer. After all bees have transferred, bring the box to the desired location.
Transferring a swarm to the box
Bees on swarm are gentle because they have no honey and brood to protect. Wear a bee veil. One could not determine if bees are aggressive or not, this can protect you from bee stings. Look for the queen bee and put her on a cage. Place the queen cage on the center of the box. Be sure that one or two frames have wax strip. You may release the queen bee after four days.
Swarm on leaves or small branches can be shaken into a box containing frames with wax strips.
Transferring honey bees from concrete walls
Some bee colonies may be found in structures which could, not be moved or destroyed for some reasons. In this situation, bees could be forced to transfer to a box by means of a bee escape.
Be sure that there is only one small hole in the feral colony. By means of a sealant, attach the bee escape to the wall to cover the entrance. Bees could get out but they could not get in. Place the box with frames near the entrance. One frame in the box should contain a piece of old comb to attract flying bees.
The queen bee may transfer to the new hive on or before the fifth day. She does not need to be confined in the cage.
Management of newly transferred colonies
1. Newly transferred colonies are always under stress because of disturbance. We could describe the colony condition as abnormal.
2. Place all boxes on wooden benches 18 inches or more from the ground. Shaded or partially shaded areas provide good location for bee colonies. Apply grease on the legs of benches to prevent ants from attacking or robbing bee colonies.
3. Immediately give sugar syrup (60:40 sugar-water ratio) to the colonies. This will enhance building of new combs.
4. Limit the entrance hole to prevent robbing or drifting of worker bees.
5. Release the queen bee after four days. By this time, new combs have already been built.
6. Examine all colonies for larvae of wax moth. This is the most common pest of brood. Newly attacked combs usually have small holes on their midrib. They may also contain tunnels of larvae. If any of these symptoms appear, remove all combs after putting the queen in a cage. Give the colony new frames with wax strips and continue feeding. Place the infested combs on a freezer to kill all eggs and larvae of the pest. After 72 hours, these combs could be given back to the bees.
7. Absconding (or desertion of the hive by bees) is usually caused by wax moth infestation of the brood. Absconding is a natural behavior of native honey bees. It is actually a defensive strategy of the bees. Be sure that swarm traps are always in their proper places. Once the colony becomes strong, they could guard the brood against wax moth.
8. At least three combs should have cells with sealed honey. The presence of sealed honey increases the morale of the colony.
Swarming
Swarming is normal among native honey bees. It is one way of increasing their colonies. Since you could not stop this annual activity of the bees, be sure that your swarm traps are hung on branches of nearby trees. Melted bees wax should be applied on these wooden traps to attract swarming bees.
Provide one or two combs of capped brood to the new hive. Shake the bees into the new hive. This could be done with a jerk to cause the bees to slide from the swarm trap.
Construction of bee hives
There are many kinds of bee hives. Traditional hives in the Philippines are usually made of hollow trunks of trees or palms. Ends of these hollow materials are usually plugged with stones or wood. The movable-frame hives are recommended for easier manipulation of combs. Oftentimes, combs have to be inspected to determine the condition of the hive.
Thickness of the wood or bamboo may vary but the internal dimensions must be followed strictly. The most important dimension is the distance between side bars or top bars since the bees always maintain a natural distance between combs. This is called bee space. Width of side bars should be 27 mm.
How to melt bees wax
Wax should be extracted from old and new combs. A cheap solar wax melter could be assembled for this.Wax strips instead of wax foundation.
A locally assembled wax container is submerged in hot (but not boiling) water. Dip a marine plywood twice on the metal containing the melted wax. Be sure to moisten the plywood with soap solution before dipping. Peel off the wax after five seconds. Cut wax sheets into strips for future use. Place the wax strip on the center of the top bar. Use melted wax to glue the wax strip on the bar. Embed wires with melted wax. Bees will position the midrib of their combs on wax-coated wires.
Do's and dont's when examining a hive
Always use a hand sprayer to calm the bees. Never use smoke as advised in temperate countries. Use of smoke is appropriate in dealing with European honey bees.
Do not stand in front of the hive. You may be blocking the pathway of bees.
Always wear bee veil. Bees tend to cause bee sting near the eyes. If you are stung, apply weak acid after removing the bee sting from your skin.
Place uncapped brood near the center and capped brood towards the sides.
Cut old and brittle portions of the comb. Queen bees love to lay eggs on new combs.
Always examine for the presence of wax moth larvae, especially during the rainy season.
Remove combs not covered by bees. Store them in airtight containers containing moth balls.
Splitting the colony
Strong colonies will divide naturally through swarming. You may divide a strong colony by placing the queen bee and four or five frames of bees in another box. Shake some bees into the second box. Transfer the second box to another location; the farther, the better. Older bees will return to the first box.
Without a queen bee, bees in the first box will build several queen cells. On the ninth day, destroy small queen cells and leave the biggest one. A young mated queen bee may start laying eggs at three to four weeks after splitting the colony.
How to harvest honey
Use of honey extractor
This is an expensive device for beginners. But if your group could not put up one extractor, harvesting of honey would be more efficient. Honey extracted through this method is clean. Also, combs could be returned to the hives after processing.
Squeezing of honey combs
By means of a hot knife, cut honey combs into small pieces. Combs with brood are tied to the top bar and returned to the hive. Combs with honey are squeezed by means of a clean muslin cloth. A metal press could also be of help.
Cutting of honey combs
Combs of honey could be cut nicely and wrapped in clean plastic bags. Comb honey could also be stored in dean bottles.
Presentation of your product.Be sure to invest on good labels and clean bottles.
Source: photo from bugs.bio.usyd.edu.au; International Institute of Rural Reconstruction (IIRR) Silang 4118, Cavite, Philippines; Department of Environment and Natural Resources (DENR) Visayas Ave., Diliman Quezon City, Philippines; Ford Foundation (FF) 6th Floor, Doarcisa Bldg. Paseo de Roxas, Makati Metro Manila, Philippines; ISBN: 0-942717-31-7
COFFEE PRODUCTION
| COFFEE A Sip of Excellence "Coffee is the source of happiness and wit," said King Louis XIV who after experiencing coffee's excellent taste and distinctive aroma began to recognize the value of it. A sip of coffee reminisces significant events which shaped many a nation's history. It has chronicled historical records that date back to as far as 1200 A.D. when coffee became a very important crop in the economy of many nations. In the Philippines, the coffee industry began in 1740 during the Spanish regime. It is considered one of the high-value crops in the local and foreign markets. Coffee is among the top ten agricultural crops in terms of value. Coffee registered a total production of 123,934 metric tons valued at P6,818.84 million in 1995. Today, we are exporting to ICO and non-ICO member countries which include Japan, Singapore, West Germany, Netherlands, Malaysia, Muscat Oman, United Arab Emirates, Pakistan and U.S.A. These countries alone account for 97 percent of the total Philippine coffee export. AGRONOMIC CHARACTERISTICS Coffee trees require a rich, moist loose, well-drained soil best composed of organic matter, decomposed mold, and disintegrated volcanic rock; a well-distributed rainfall of about 40 to 70 inches annually with peak wet season' high humidity; seven hours of sunshine daily; and plenty of mist and moderate winds. Coffee trees vary greatly in sizes from dwarf trees to thick-trunked forest giants twenty feet or more in tropic. Generally they are restricted to areas with a medium average annual temperature of 70oF, not lower than 55oF and much above 80oF.
VARIETIES
Arabica is characterized by wavy leaf
margin, light green leaf color, thin leaves, pulp and parchment,
known as " kapeng tagalog." Yields 500-1,000 kg of
clean dry coffee beans per hectare. It could be grown productively
in cooler places with an elevation ranging from 1,200 to 1,800
meters above sea level.  Robusta is characterized by large umbrella shaped growth with thinner leaves which have more wavy margins. The berries are borne in heavy cluster with the pulp and parchment. Yields 1,200 kg of clean  dry
coffee beans per hectare. It could be grown in areas with an
elevation ranging from 600 to 1,200 meters above sea level. dry
coffee beans per hectare. It could be grown in areas with an
elevation ranging from 600 to 1,200 meters above sea level.Excelsa has wide leaves that are thicker than Robusta but thinner and smoother and more rounded than Liberica with smooth edge. Young leaves are usually shiny with bronze violet color. The berries are borne in heavy cluster, varying in size and usually bigger than Arabica but smaller than Liberica. Pulp and parchment are thicker than the Leberica. Yields 1,000 kg of clean dry coffee bean per hectare. It could be grown from sea level to 600 meters above sea level.  Liberica is locally known as "kapeng barako" because it produces the biggest berry. It is rounded and are borne signly or in small clusters. Has thicker leaves than Excelsa and twice as long as Arabica. The pulp is thick and the parchment is more woody. It also characterized a very strong pharmocopical taste and flavor. It is tolerant to drought and grows in a wider type of soil. Yields 1,000 kg. Of clan dry coffee beans per hectare. TECHNOLOGY Seed Preparation
Establishment of Plantation Intensive clearing is necessary for newly opened areas (forest area). Plow and harrow twice open field to check weed growth. Mark places where holes are to be dug. Recommended spacing are as follows:
Coffee seedlings are ready for transplant when 6 pairs of leaves have been fully developed and with no lateral branches yet. Dig holes and transplant in the field at the start of the rainy season. This will give sufficient time for young plants to establish roots before dry season sets in. Dig hole wide and deep enough to accommodate ball of earth with roots intact. Return topsoil in the hole, then add tablespoons phosporous fertilizer, and mix thoroughly. Fertilization  The
general recommendation
for non-bearing trees in the absence of soil and tissue analysis,
is an equal amount of NPK and ammonium sulfate or urea from
250-300
grams per tree per year; and for bearing trees (7 years and above)
1 kilo of 14-14 per tree per year plus ures sidedressed at the
rate of 300 grams per tree per year. The
general recommendation
for non-bearing trees in the absence of soil and tissue analysis,
is an equal amount of NPK and ammonium sulfate or urea from
250-300
grams per tree per year; and for bearing trees (7 years and above)
1 kilo of 14-14 per tree per year plus ures sidedressed at the
rate of 300 grams per tree per year.Non-bearing trees (1-3 years old) make shallow canal furrow 5 cm deep around the plant;  place recommended fertilizer in continuous band and cover with
soil.
place recommended fertilizer in continuous band and cover with
soil.Bearing trees (7 years old)-localized placement is recommended for sloping land. Apply fertilizer in holes or trenches made around trees between outside of the crown and onehalf meter from the base. Broadcast fertilizer 0.5m for level land. Pruning Removal of unnecessary branches (excess, old and dead branches) and undesirable sprouts. Pruning regulates the height of the plants, facilitates harvesting and other field operations, promotes better aeration and light penetration. This is best done before general flowering or after harvest. Common Pests and Control Coffee Berry Borer most destructive and hardest to control. Attacks all stages of fruit after berries become mungo-size. Infested young berries turn from normal green color to yellow orange and shortly afterwards, fruit falls prematurely. Presence of empty or partially filled fruits underneath tree is a sure sign of infestation. Coffee Leaf folder larvae feed on leaves and sometime attack flowers and fruits. Adult is a small moth with light brown forewings. The eggs are laid in clusters on leaves. Development period is 5-6 weeks. Control: Collect and destroy infested berries before and after harvest. Pick up all berries, including those that fall on the ground, to eliminate breeding and feeding sites of insects. Spray Endosulfan at recommended rates at 14 to 21 days interval or 4 to 5 times spraying during fruiting season. The first spraying should be done when the berries attain the size of a mungbean seed. Common Diseases and Control Coffee Rust the most prevalent and destructive disease of coffee, Small, yellowish spots appear on lower surface of leaves; as spots enlarge, powdery yellow to orange spores are produced. Affected leaves drop and tree may die. To prevent, use resistant strains, spray susceptible varieties with copper fungicides at 2-3 week intervals at start of heavy rains. Die-Back is characterized by drying of branches and twigs from to and downwards. Appearance of spots with concentric lines on both surfaces of seedlings, twigs, and berries. If severe affected, leaves fall, twig and branches dry. To control, maintain vigor of trees by fertilizing with the right kind and amount of nutrients at proper time; regulate plant growth to prevent overbearing by pruning and/or shade. HARVESTING  Maturity
of berries
is 6 to 8 months after blooming but varies on the environmental
factors from region to region. In Mindanao, Arabica flower in
January to May and berries are harvested in August to December.
In Luzon, coffee trees bloom just after the first heavy rains
in May and June, Arabica and Robusta berries are harvested in
late December to March; Excelsa and Liberica later. Maturity
of berries
is 6 to 8 months after blooming but varies on the environmental
factors from region to region. In Mindanao, Arabica flower in
January to May and berries are harvested in August to December.
In Luzon, coffee trees bloom just after the first heavy rains
in May and June, Arabica and Robusta berries are harvested in
late December to March; Excelsa and Liberica later.Individually pick berries (i.e priming) to avoid presence of pedicels. For quality beans, harvest only matured berries (i.e. berries turn red from its ground color.) |
||||||||||||||||||||||||||||||
SOURCE: www.da.gov.ph | ||||||||||||||||||||||||||||||
 Coffee
is grown
from seeds;
Coffee
is grown
from seeds;


Swine(Hog) Production (Piggery)

Swine raising is common and
practical among farm families. This is because of the many advantages
it gives the raiser which allows them to lessen the costs they spend
while farming. For example, pigs convert feedstuffs and waste materials
not used by man into pork, swine also has shorter development period
which can add to the income of the raiser. The farmer/raiser can also
use hog manure to fertilize his farm. Also, pork is the most common
source of protein.
Popular Breeds
If you want your swine business to succeed, choose the right breed to raise. Below are the characteristics of breeds that grow well specially in Region 2.
Duroc - It is a heavy breed with color that ranges from light to very dark red, almost like the color mahogany. Durocs are productive, good mothers and milkers. It has good quality meat with very high dressing recovery percentage. It is excellent for cross-breeding.
Landrace - This is a light breed. It is white although you would commonly see black spots. It has a long body, square meat, short legs, ans medium to large drooping ears. They are good mothers, heavy milkers, and produce large litters from 14-18 piglets with very good growth rate and good food use. The thickness of the body and weak hind legs can be improved by crossbreeding with Large White or Duroc.
Yorkshire or Large White - It is heavy and is all white. The face is slightly couping and its ears are erect. They grow fast and give you high quality meat. They have string legs, are excellent mothers, have good character and wean from 10-12 piglets to a liter. It fine for them to be confined, have very good growth rate, and high feed conversion ratio.
Hypor - This is a hybrid. It was developed from four synthetic lines from carefully selected breeds. They are white with fairly long body. Ears are medium sized and drooping. They are good mothers, produce an average of 9 piglets to a liter. Have well muscled backs, well developed hams, and superb carcass quality.
Seigher - This fellow is from Belgium. It is entirely white with occasional black spots. Although they have weak feet, and they can't adapt well to rugged conditions, they have well-developed body, well- muscled back, medium to large drooping ears, very good mothers, good milkers and meat quality. They also have high growth rate and feed conversion ratio.
Selection of Breed
These are the things you have to observe so you'll know you have chosen to raise an animal with a good breed. This will help in the success of your production.
Genes
The genes of the animal helps a lot in the success or failure of your swine business. The environment, though, contributes, or otherwise, to the performance of you pigs. To improve your production through breeding, select the desired characteristics. Below is a summary of heritability estimates of characteristics of swine:
Trait and Heritability
Length of body - High
Length
of legs - High
Number of vertebrates -
High
Number of teats - High
Conformation - High
Carcass
length - High
Loin eye are - High
Backfat thickness - High
Percent
lean cuts of liveweight - High
Ham-loin
index - High
Weight of pig approximately 6
months - Moderate
Rate of growth -
Moderate
Feed efficiency - Moderate
Litter size of birth - High
Litter size of weaning - High
Weight of pig at birth - High
Choose a boar that has well-developed testicles. The size of the testicles is related to its ability to produce sperm. So do not allow boars that have defects in this area to reproduce, because this is highly hereditary.
A well-arched or straight back is good because it means the animal can move around well for mother pigs, a long body is good, along with even-distanced teats.
Your animal should also have good reproductive characteristics. If it gives birth to NOT less than 8 piglets/birth, it means it has high ovulation rate, low embryo deaths, can produce large quantities of milk, and is a good mother.
Good feed efficiency is also a good trait. This means, it is a trait of a good breed if there needs a lesser amount of feeds to have gain weight. This is trait can be inherited.
Housing and Facilities
Selection of Farm Site
Select a site that is well- ventilated and has good drainage. Damp and unhealthy environment makes the pigs prone to diseases.
Water is also important. The pigs needs lots of water for better performance, and water is also needed to maintain cleanliness and sanitation, as well as to keep the animals cool during warm weather. Put up your hog house in a place where not many visitor/ people go. And for good drainage, a slightly sloping area.
If yours is a backyard operations, you can use locally available materials for roofing, like bamboo, nipa, or anahaw. Use lumber or bamboo for sidings, and a concrete floor. Don't use preservatives on the lumber as this may cause irritation to the animals. Put together in one pen the gestating, farrowing, and nursery pigs. Put together in another pen the growing and finishing animals.
For semi-commercial operations, make a piggery using more permanent materials such as concrete floors and walls, and galvanized iron sheets for the roof. In this pig house, make compartments a) where the pregnant animals stay until farrowing time, b) as a farrowing unit, c) as nursery unit where sows an piglets are kept until weaning, d) as growing unit where pigs are raised form weaning until they reach about 45 kgs. and e) as finishing unit where pigs are kept until they are ready to be marketed.
Plant trees around the area as windbreakers.
Age/Weight : 6-10 weeks(weaning to 35 kg)
Floor space (sq m): 0.5
Height of ceiling (cm): 75
Feeder/ WatererSpace (m): 0.2
Age/Weight : 10-15 weeks(36-60 kg)
Floor space (sq m): 0.7
Height of ceiling (cm): 85
Feeder/ WatererSpace (m): 0.3
Age/Weight : 15-20 weeks(61-90 kg)
Floor space (sq m): 1.0
Height of ceiling (cm): 100
Feeder/ WatererSpace (m): 0.4
The floor of your pen must be concrete, and should be slightly sloped to allow good drainage thus keeping the pen dry and free of organisms that might cause sickness to your animals. Don't make you floor too rough as this may cause sores on the animals, and not too smooth because it will be slippery when wet and is dangerous for pregnant sows.
A farrowing stall reduces crushing of piglets. Put up a farrow stall by placing rails around the pen 20-25 cm from the walls and the floor. Waterers and feeders should be installed 30-40 cm high from the floor for breeders and growing finishing pigs, and 20 cm high for weanlings. Make sure that waterers and feeders hold at least the daily amount of water and feeds by needed by the animals.
Newly born pigs are not able to control their body temperatures until they are 2-3 days. Give the piglets heat by lighting them especially during cold days. Hang the lamp 40-70 cm above the floor, and adjust the height of the bulb upward as the piglets grow larger.
Marketing
Marketing is the last activity you do in raising pigs for business. You should get up to date information of market prices of pork, or where it is needed and how much is needed (supply and demand information).
Hogs are usually sold to middlemen who in turn will act as buyers and sellers for big meat processors. But you can sell direct to these meat processors where you can bargain for a higher price for your produce. But here are tips in marketing your pigs:
a.sell your hogs when they reach 80-90 kilos. If they are heavier than the said weight, they may contain more fats.
b. Allow your mother pig to recover from the stress of milking before selling.
c. You can choose not to sell to middlemen. They are experts in the trade and usually, the producers are in the losing end because the prices are always underestimated.
d. Sell the hogs in weight basis and not in per head basis.
Source: Region 2 Technoguide DA, Swine Raising LDC Technical Bulletin #1 DA, www.da.gov.ph, photo courtersy of www.um.dk/publikationer
HOW TO MAKE BEER

It is so simple you can do it yourself in your kitchen in
about 15 minutes. You can modify this method, of course, you only have
to remember that the more sugar, and if fruits are used; the brewing
will create a stronger drink.
Ginger Beer
Ginger Beer
INGREDIENTS:
1
cup raw sugar
2-3 tablespoons freshly grated ginger root (luya)
Juice of 2 lemons (kalamansi)
Strips of lemon peel (balat ng kalamansi)
1/4 teaspoon fresh champagne yeast (from a home-brewer store) ( you can also use an ordinary yeast used in making bread)
Fresh, pure water
2-3 tablespoons freshly grated ginger root (luya)
Juice of 2 lemons (kalamansi)
Strips of lemon peel (balat ng kalamansi)
1/4 teaspoon fresh champagne yeast (from a home-brewer store) ( you can also use an ordinary yeast used in making bread)
Fresh, pure water
PROCEDURE:
For 1 liter of ginger beer:
clean 1 liter plastic soft drink bottle with cap; it’s not a bad idea to
pour a little hot water over and into them to sterilize, but be careful
not to boil them! (you can also use smaller or larger bottle depending
on size of batch; I prefer four 500 mL plastic bottles)
1) Gently boil the sugar in 1 cup of water with the ginger root and strips of lemon peel from one or more lemons (not the white pith, just the outer yellow skin), until thickened and syrupy - about half an hour. Let cool to about 90-100 degrees - about an hour depending on your room temp.
2) Dissolve the yeast in a little warm water and let sit for no more than 10-15 minutes.
3) When the syrup has cooled, remove lemon peels but leave in ginger. Add the yeast and stir well. Split the ginger syrup evenly between the bottle/s.
4) Fill the bottles with fresh water to about 1 1/2 - 2″ from the top. Put the caps on securely. Squeeze a bottle near the top to feel how it feels un-carbonated.
5) Place the bottles in a warm out-of-the-way place for 24 hours if it’s warm (80-90 degrees) - I put ours inside a cooler in the workshop, in case a bottle blows, to confine the mess. To check the bottle for carbonation, gently - gently! - squeeze and you’ll feel the firm pressure. If it’s cooler, it might take longer.
6) After the ginger beer has carbonated, refrigerate to stop the yeast action. It’s advisable to release a little of the pressure when it goes into the fridge - loosen cap slightly and let it “pish” just a tad.
7) To serve, pour through a strainer, and don’t pour all the way out or shake, as you don’t want the yeast sediment in the bottom.
Enjoy!
{}{}{}{}{}{}{}{}{}{}{}{}{}{}{}{}{}{}{}{}{}
How to make hollow blocks

CEMENTLESS
SOIL BLOCKS
In view of the rising cost of cement, the Forest Products Research and Development Institute made an attempt to form building blocks out of soil and water alone or in combination with one or two other agri-forestry waste materials, such as rice hull, coconut coir dust and wood ash. Lime is used as a binder. Lime is found in large quantities in Rizal, Negros Occidental and Davao Oriental. Coconut coir and other materials are available almost nationwide.
Materials:
Lime Soil
Coconut coir Sand
Rice hull Wood ash
Rice hull ash
Equipment:
1/4 inch mesh screen
mold
shovel
Procedure:
1. Pulverize the soil and remove larger pieces with the use of a 1/4 inch wire mesh screen.
2. Mix together soil and any one or two of the agri-forestry wastes. Suggested combinations (in parts by volume) are:
a. 3 soil + 1 coconut coir
b. 3 soil + 1 rice hull
c. 5 soil + 1 lime
d. 5 soil + 1/2 lime + 1/2 rice hull ash
e. 5 soil + 1/2 lime + 1/2 wood ash
f. 4 soil + 1 rice hull + 1 lime
g. 21/2 soil + 21/2 sand + 1/2 lime + 1/2 wood ash
3. Form a hill out of the dry mixture (or of soil alone if a pure soil block is to be made) with a crater on top and add water.
4. Pour water slowly and with a shovel, mix the materials until a paste is formed. The paste should neither be too dry nor too wet so that during the molding process. The ingredients are wet enough to stay packed but not too wet to produce slump when the product is removed from the mold. The right mixture can be learned easily by experience.
5. Fill the mold with the mixture. Tamp very well and level off. Apply pressure using a manually-operated molding machine or a similar device.
6. Dry the block in the shade for a few days and then sun dry for another few days.
Source: Forest Products Research and Development, Institute (DOST) College Laguna
LIME-CLAY-SAND BLOCKS
With the materials that are available all over the country, Industrial Technology and Development Institute fabricated blocks which need no firing. The block has a square face and grooved sides which allow adequate surface for bonding. It measures 8"x8"x6". The provinces of La Union, Bulacan, Batangas, Quezon, Bohol and Negros Occidental have reserves of all the 4 non-metallic ores herein used. Clay and limestone may be found in almost all the regions while sufficient amount of sand and gravel occur in Regions III, IV, VI and X.
Materials:
Clay Gravel
Lime Water
Sand
Equipment:
Pickax Wire mesh screen
Shovel Wooden measuring box
Procedure:
1. Crush the lumps of clay into smaller pieces with a pickaxe. With the use of a wire mesh screen, remove impurities, such as stones, roots, twigs, etc.
2. Sift the lime and the sand separately to remove the bigger particles.
3. Mix thoroughly five (5) boxes of clay, two (2) of lime and two (2) of sand.
4. Add water slowly until the right consistency is reached. The mixture should neither be too wet nor too dry so that when molded, the block will maintain its shape.
5. Press the mixture into a wooden mold until all spaces are filled up and scrape off the excess.
6. Remove the mold and allow the formed block to stand in the shade for 3 days. Then sun-dry for another 3 days.
Source: Ceramics Research Division ITDI (DOST)
HOLLOW BLOCKS FROM RICE HULLS
Procedure:
1. Carbonize the rice hulls.
2. Pulverize the ash.
3. Mix the following:60 parts cement40 parts carbonized ashwater
4. Pour the mixture into wooden molds
5. Allow to dry.
Source: Forest Products Research and Development , Institute (DOST) Los Baños, Laguna.
HOLLOW BLOCKS FROM WASTE MATERIALS
A new type of hollow blocks can be fabricated out of wood wastes, agricultural wastes and soil mixed with minimum amount of cement. As far as strength and durability are concerned, results of test showed that this type of blocks is comparable to some of the commercial or traditional concrete hollow blocks. However, they are considered as strictly non-loading bearing.
Materials:
1 part cement
3 parts sawdust, ordinary soil, rice hulls, abaca waste, sugarcane bagasse, coconut coir dust and coconut trunk.
Procedure:
1. Pulverized soil is passed through a wire screen, 1/4 inch wire mesh to separate larger pieces. A mixture of 1 part cement to 3 parts agri-waste is formulated.
2. Mix all materials together, add water and pour into molds.
3. Let stand for several hours until dry.
4. After drying, remove from molds and let stand along one side for 10 days while sprinkling water at regular intervals to avoid cracking.
Source: PCARRD Farmnews December 1988, Photo courtesy of www.hindu.com